

Incoming Streaming
The UNIDEX streaming module allows playback of an incoming audio stream. The source can be another device within the LAN network or a streaming server accessible via the Internet. In the equipment’s interface, this function appears identified as DOWN-STREAM (RX). This appendix describes the network connection, the incoming stream configuration, the assignment of theSTREAM-1 input, and the basic channel settings.
LAN Connection
Audio reception via streaming is performed through the Ethernet port labeled Streaming Out.1
Connect the streaming port
Connect the Streaming Out Ethernet port to the router using a standard UTP cable.
2
Verify the streaming module IP address
The router will assign an IP address to the streaming module via DHCP. This address appears on the main screen as 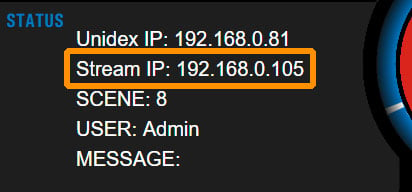
Stream IP.3
Choose the configuration method
Settings can be made from the UNIDEX UX24 touchscreen. They can also be configured from a web browser by accessing the
Unidex IP address. The original appendix recommends Google Chrome.Stream IP identifies the IP address of the streaming module. Unidex IP identifies the IP address used to access the web control interface.Incoming Streaming Configuration
1
Open SETTINGS
From the main screen, tap SETTINGS.
2
Open STREAMING
On the SETTINGS screen, tap the STREAMING option.
3
Select DOWN-STREAM RX
Tap the DOWN-STREAM (RX) tab.
4
Enable the module
Change the ENABLE/DISABLED control to ENABLED.
5
Select the protocol
In the PROTOCOL field, select the protocol according to the type of streaming and the protocol used by the encoder equipment or by the streaming source.
6
Enter the streaming source
In SERVER URL, enter the URL or IP address of the streaming source. When the selected protocol is HTTP, the
PROTOCOL: http
SERVER URL: server1.stweb.tv
PATH MOUNT: /rcvos/live/playlist.m3u8
PATH/MOUNT field appears, required by Icecast servers.For public streaming links under http or mms protocol; the link must be interpreted to load each piece of information into the corresponding field. For example, the streaming link https://server1.stweb.tv/rcvos/live/playlist.m3u8 is entered as:PROTOCOL: http
SERVER URL: server1.stweb.tv
PATH MOUNT: /rcvos/live/playlist.m3u8
7
Enter the port
In PORT, enter the same port number defined in the encoder or in the streaming source.
For public streamings (http; mms) enter port 0.
For public streamings (http; mms) enter port 0.
8
Apply the configuration
Tap APPLY to confirm the values.
Audio Protocols and Formats
UNIDEX supports the following protocols for incoming streaming:- RTP (PCM 44.1 kHz and MP3)
- HTTP, for Icecast and Shoutcast servers
- MMS
Port Forwarding
Depending on the network architecture, it may be necessary to configure port forwarding, also known as port forwarding, for the incoming stream to reach the UNIDEX UX24. This applies, for example, when an RTP stream originates from outside the LAN.When the streaming source and the UNIDEX UX24 are located within the same LAN, it is not necessary to configure port forwarding.
Assigning the STREAM-1 Input
When the DOWN-STREAM (RX) module is enabled, the incoming audio signal automatically replaces theAES3 1 stereo input. The label for that input changes to STREAM-1.
To assign STREAM-1 to a console channel, follow this procedure.
1
Open SETTINGS Screen
From the main screen, tap SETTINGS. The INPUTS option will be displayed.
2
Open Input Configuration
Locate the
STREAM-1 L and STREAM-1 R inputs. If necessary, use the rotary encoder.3
Confirm Stereo Mode
Tap the mode control and set the input to STEREO. This is the default mode for
STREAM-1.4
Assign the Input to a Channel
Tap the ASSIGNED TO CHANNEL dropdown menu and select the channel you want to assign the
STREAM-1 input to.5
Return to Main Screen
Press BACK to return to the main screen.
Channel Configuration
After assigningSTREAM-1 to a channel, configure the channel’s basic parameters: mode, label, gain, and the behavior of the CUE button.
1
Enter channel selection mode
On the main screen, press CHANNEL. The CUE buttons temporarily switch to SELECT mode.
2
Select the channel
Press the SELECT button for the channel you wish to configure. The console returns to normal mode and displays the CHANNEL screen for the selected channel.
3
Select a virtual channel
To select virtual channels, turn the encoder until you locate the desired channel and press the encoder to confirm.
4
Configure the channel mode
Set CHANNEL MODE to LINE.
5
Edit the label
To edit LABEL, touch the channel name. A touch keyboard will appear to enter the new label.
6
Adjust the gain
Turn the encoder until the GAIN control is highlighted. Press the encoder and then turn it to modify the value.
7
Define the operating level
Adjust GAIN so that signal peaks reach approximately
-9 dBFS on the level meter.8
Configure CUE behavior
In the ACTIONS section, define the behavior of the CUE button for that channel. The original appendix shows the options
CUE SOLO and CUE AUTO-OFF.Reference Diagram
The diagram shows a typical application with a main station and a remote site.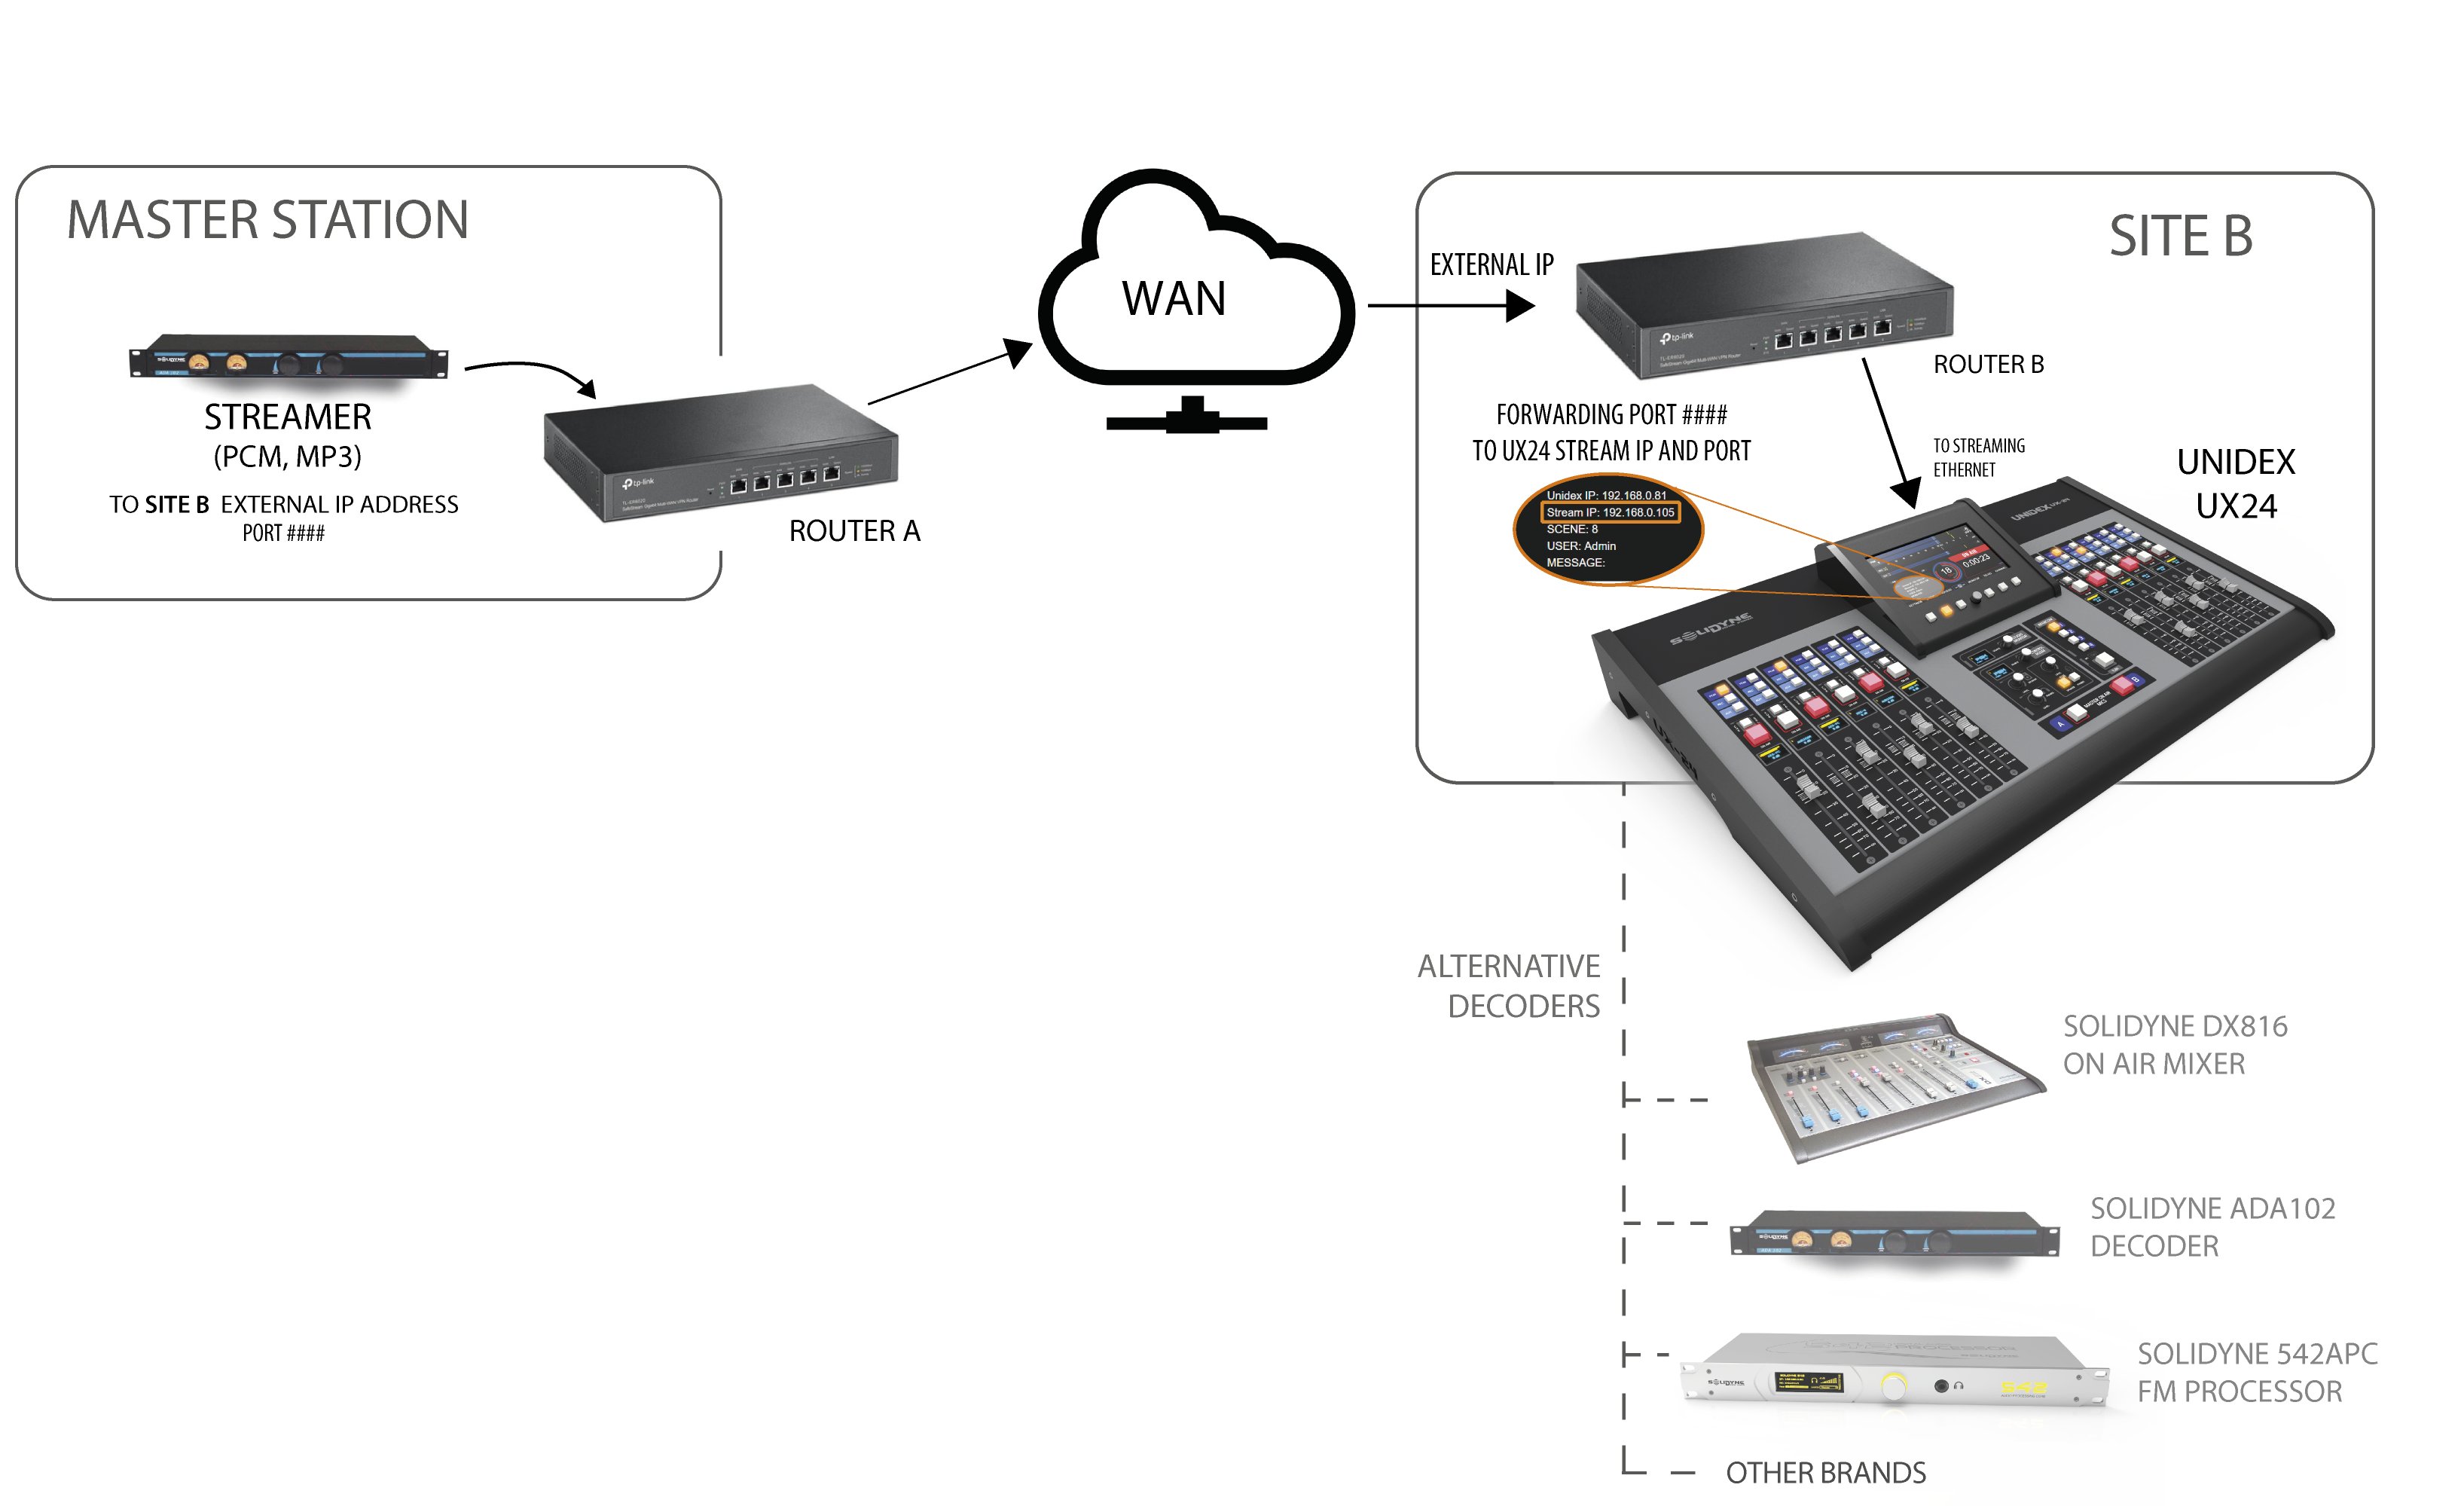
Stream IP address and to the port configured in the DOWN-STREAM (RX) module.
In a connection within the same LAN, the streaming source can reach UNIDEX directly without port forwarding.
- Solidyne DX816 On-Air Mixer
- Solidyne ADA102 Decoder
- Solidyne 542 APC FM Processor
- Equipment from other brands