

The web control screens offer the same options as the built-in touchscreen, although the arrangement and layout of some controls may vary.
This section describes only the screens that present the most significant differences.
This section describes only the screens that present the most significant differences.
Connecting UNIDEX to the Network
LAN ConnectionAccessing the WEB Control Interface
From a computer connected to the same LAN as the UNIDEX (preferably via cable), open a web browser —Google Chrome is recommended— and enter the Unidex IP address to access the operation and configuration control interface. Upon access, the main screen will be displayed, very similar to the one that appears on the console itself.User Profile
Allows switching the user for the web interface, independent of the user set on the hardware. A dialog box will be displayed to enter the username, followed by another to enter the password.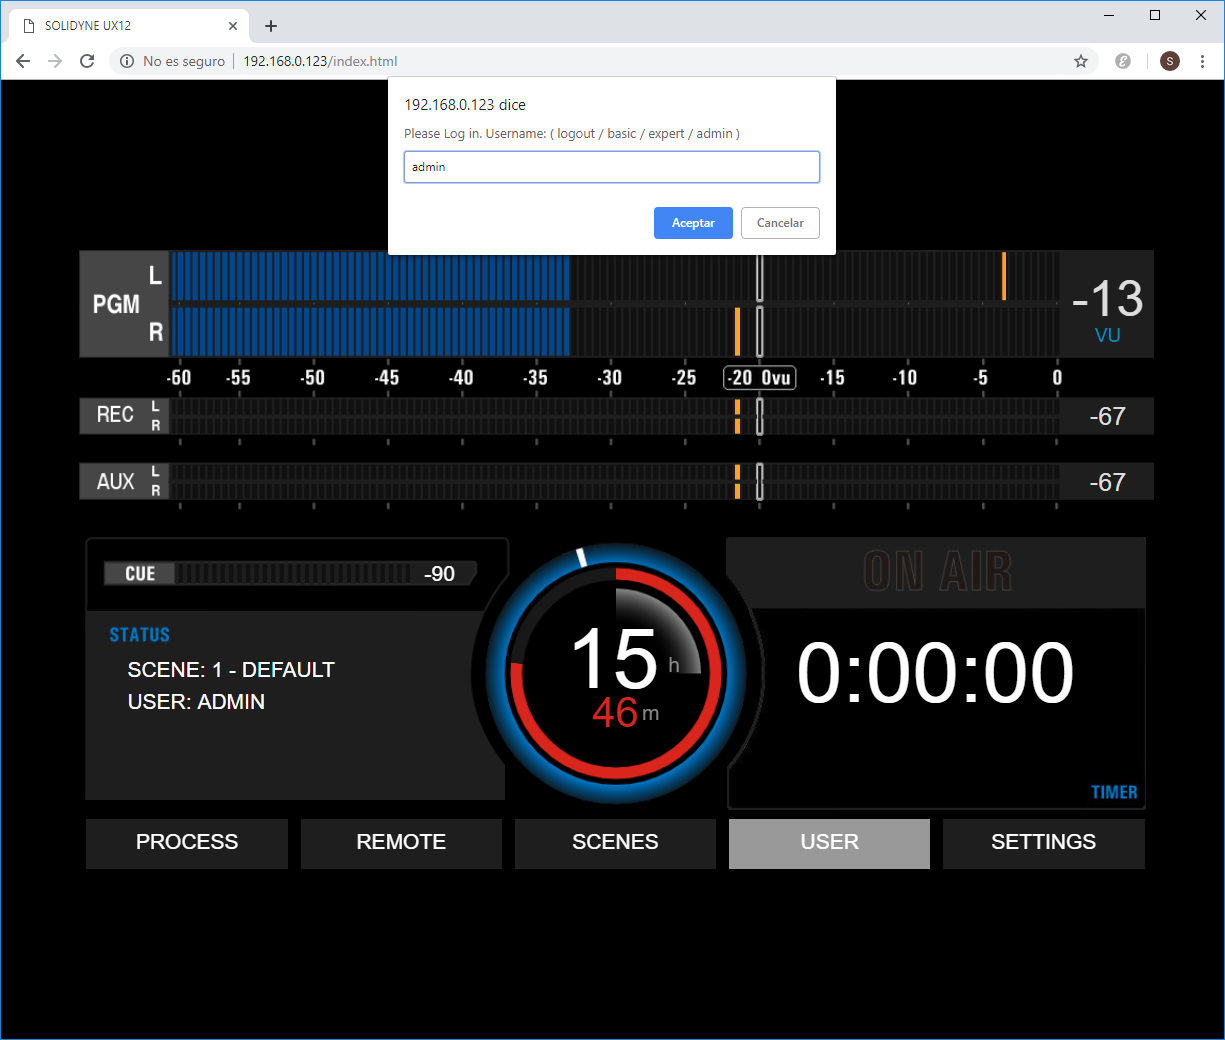
There are three user profiles:
- ADMIN with full access.
- EXPERT with access to some advanced functions.
- BASIC with restricted access.
Remote Operation Interface
Selecting the REMOTE CONTROL option in the menu provides access to the remote operation interface. The available functions are the same as those offered by the hardware and the onboard screen, so the explanations in this manual for each of them are valid. However, there are some operational differences described below. The main screen of the remote interface is similar to the HOME screen on the hardware.It includes level meters, counters, ON AIR signaling, and a quick-access menu in the lower area.
- PROCESS: Direct access to the processors screen. It is also possible to reach this screen from the mixing console.
- REMOTE: Opens the mixing console, a graphical interface that emulates the controls of the console’s physical surface.
- SCENES: Allows switching scenes. The change is performed directly on the console, just as if done from the onboard screen. The web interface does not have its own scenes, although scenes can be imported from disk.
- SETTINGS: Access to configuration options. The options are presented in a vertical menu, similar to the layout of the onboard SETTINGS screen.
Mixing Console
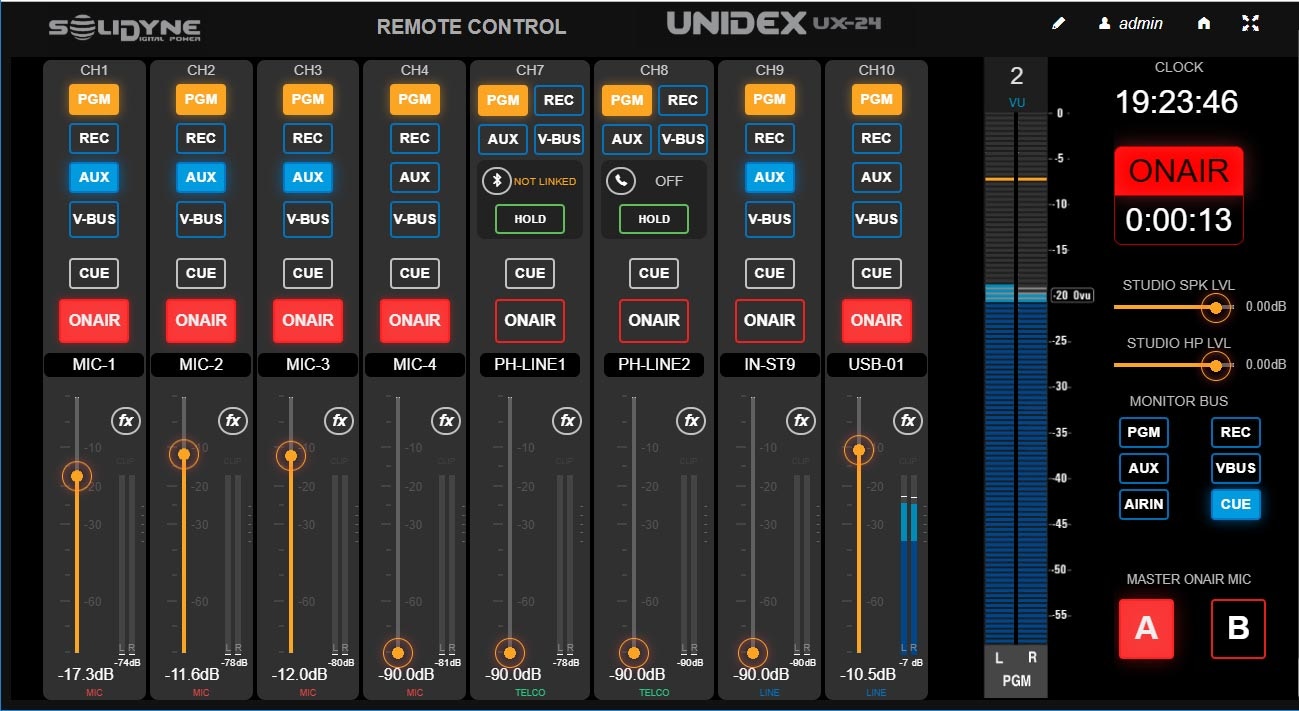
The WEB interface can control all console channels. Its design is optimized for use on touch screens. A “traditional” application is to configure it as an auxiliary controller for the onboard screen, running on a large touch monitor.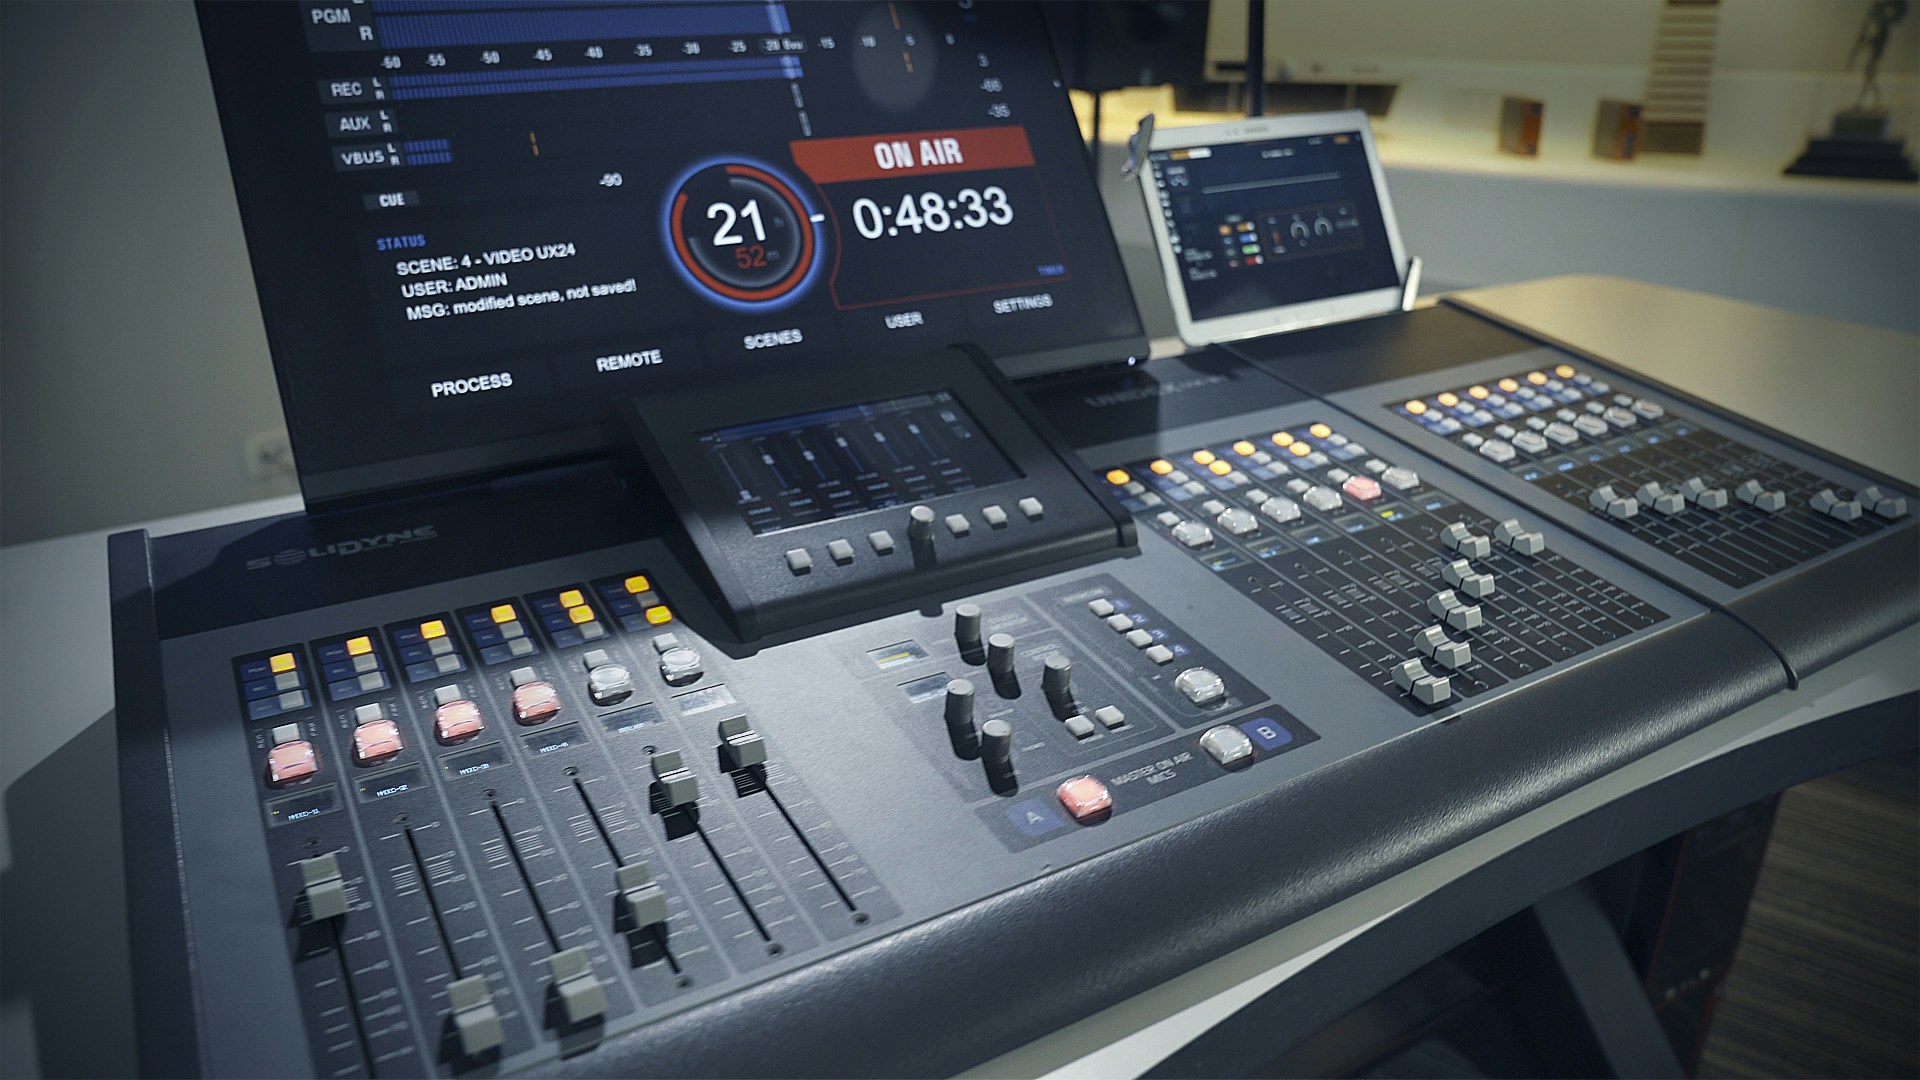
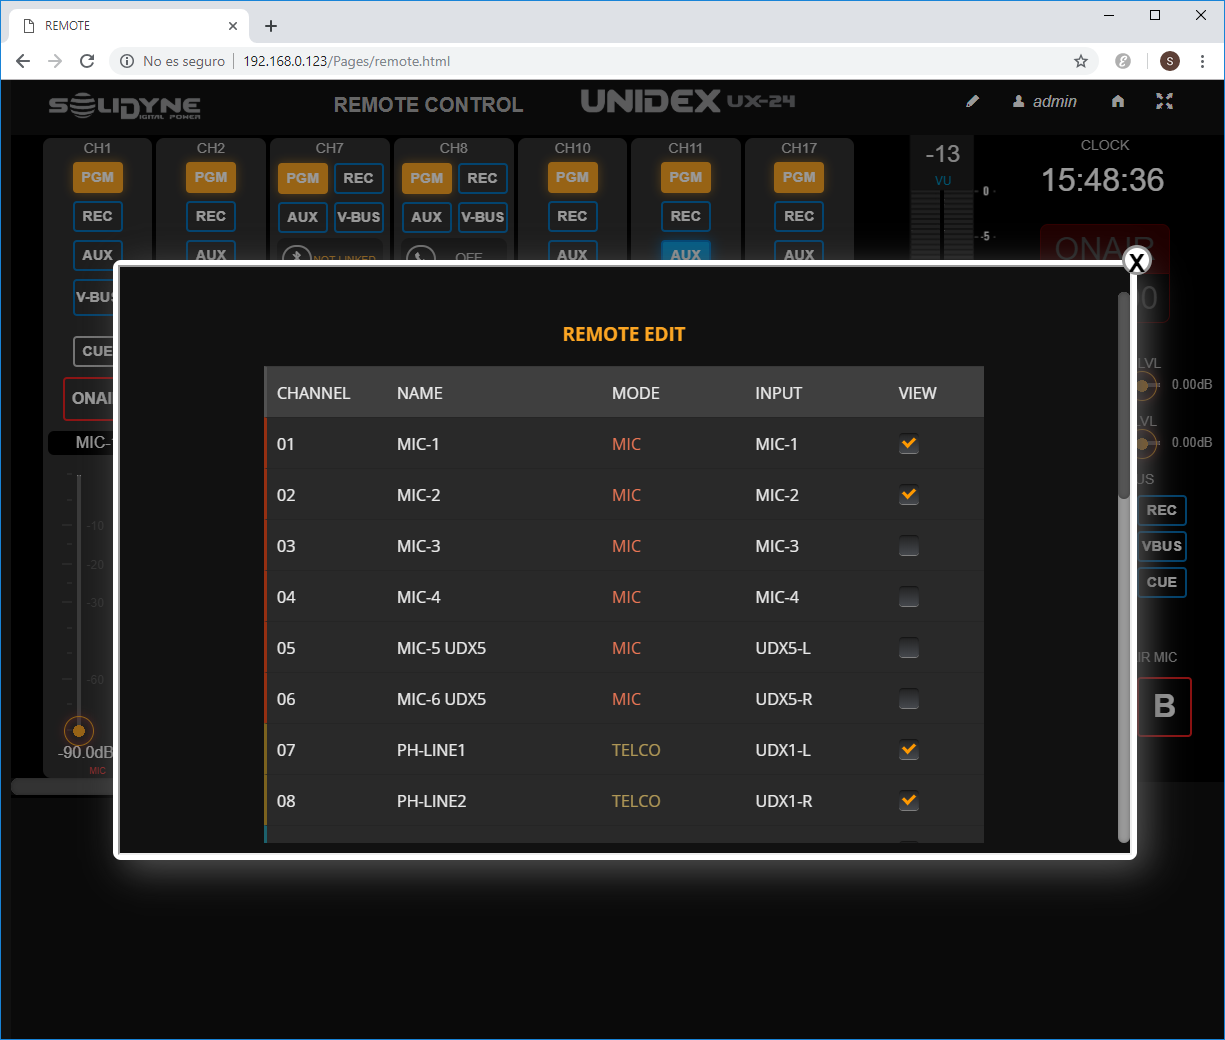
This setting can be saved to the active scene.
Microphone and Line Channels
On each channel, the same controls present on the console surface are replicated.Operations performed from the web controller are immediately reflected on the physical console.
- BUS BUTTONS: Assign the channel to the corresponding bus.
- CUE: Activates CUE monitoring for that channel. The audio is heard through the CUE circuit on the console.
- ON AIR: Toggles the channel on/off.
- FADER: Controls the channel level.
- When adjusted from the web controller, the console updates the level and displays the value in dB on the OLED screen, which flashes to indicate the change was remote.
- The physical fader is not motorized, so its position does not change. If the operator moves the physical fader, the level smoothly adjusts to the new value and the web interface updates the fader position.
TELCO Channels
TELCO channels include, in addition to the controls already covered, a RING/HOLD button that allows you to answer an incoming call; and information about the line status. However, talkback and dialing functions must be performed from the console, or in a remote studio configuration, using an associated phone.Audio Processing
In the remote interface, audio processing is accessed from the PROCESS option on the REMOTE CONTROL home screen, or from the FX icon on each channel of the web mixer. Available processing:- Parametric equalizer.
- De-esser.
- Compressor and noise gate.
Processing is assigned to inputs, so the availability of each one depends on the input connected to the channel.
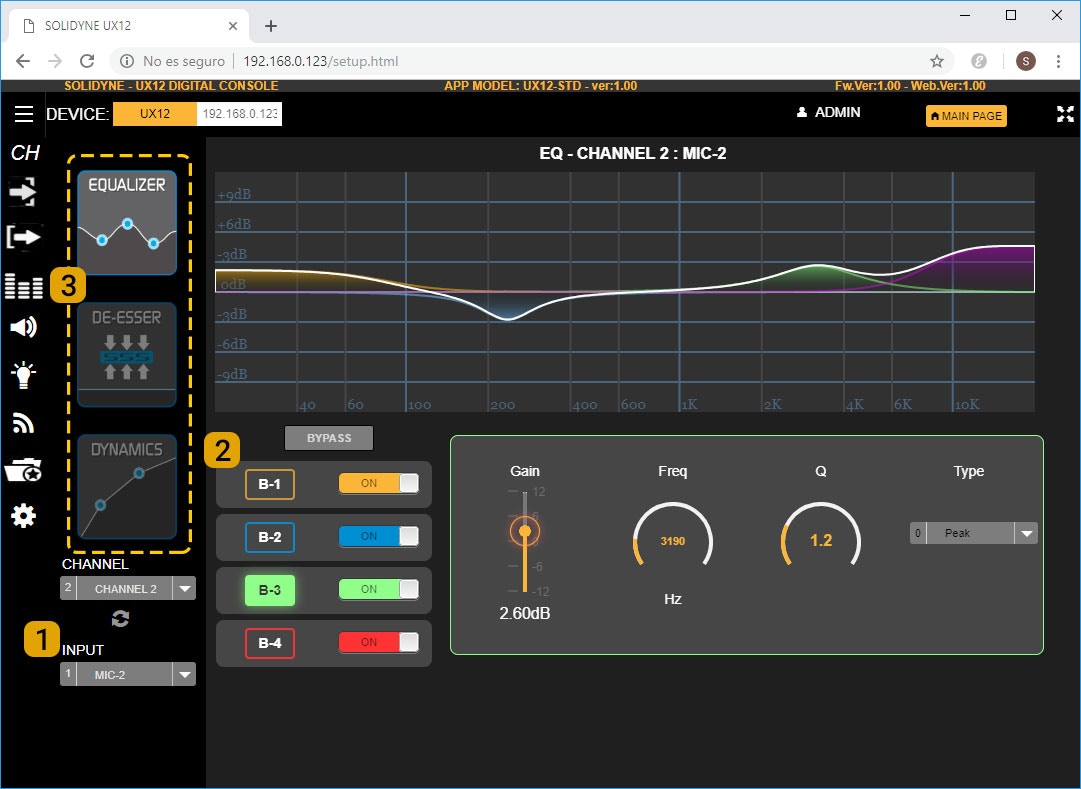
- Processors are inserted on each input.
- To view them, select the input from the INPUT (1) dropdown menu.
- A channel can also be selected from CHANNEL; the interface will show the processing for the input assigned to that channel.
- In the Parametric EQ, the remote interface has some differences compared to the onboard screen:
- The ON/OFF buttons enable or disable each band.
- The B1, B2, and B3 checkboxes allow you to select the band to edit (2).
- This design reduces the number of visible controls and makes them easier to use on touchscreens.
- Switching between processes is done by tapping the corresponding icons (3).
- The available processes change depending on the selected input.