

The SETUP Screen
The SETUP screen is one of the four main screens.It is accessed by turning the encoder and allows you to configure all network and broadcast options.
- The initial view shows the status of Wi-Fi, Ethernet, and Modem.
- For each connection, it indicates whether there is an assigned IP or if it is inactive.
- For Wi-Fi, the network name you are connected to is also displayed.
SETUP → Wi-Fi
- Lists available 2.4G and 5.8G wireless networks, sorted by signal strength.
- Signal level is expressed in dB millivolts (values closer to 0 = stronger signal).
- The Wi-Fi interface MAC appears in the top right corner.
Some providers require reporting the interface MAC to authorize the connection.
SETUP → Ethernet
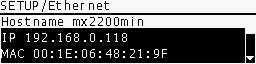
- Configures wired network parameters.
- From the factory, it comes with DHCP enabled, so it receives an IP address automatically.
- To use a static IP, DHCP must be disabled and the following must be assigned manually:
- IP Address
- Subnet Mask
- Gateway
- DNS Servers
- Displays the MAC address as informational data (not editable).
SETUP → Modem
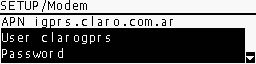
- Compatible with 4G dongles (plug & play).
- Modern dongles act as Ethernet adapters and do not require configuration.
- Older 3G dongles need APN, username, and password parameters (provided by the ISP).
- If the connection is active, it shows an IP address other than 0.0.0.0.
SETUP → RTP Stream
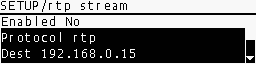
- RTP streaming configuration:
- Destination IP address
- Port
- Codec (MP3, Opus, PCM)
SETUP → HTTP Stream
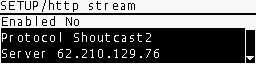
- Configuration for streaming to Icecast/Shoutcast type web servers.
- Enter the credentials and parameters of the contracted server.
SETUP → SIP Account
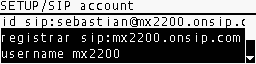
- Entry of SIP account data (provided by the service).
- At least two accounts are required:
- One SIP address for the console. Example:
[email protected]. - One SIP address for the studios, which will be configured in the VoIP software used to receive (or generate) the calls. Example:
[email protected].
- One SIP address for the console. Example:
SIP services can be free (e.g., Linphone) or paid, depending on the complexity of the implementation.
SIP Audio Quality
The SIP account QUALITY setting allows you to set the preferred audio quality for SIP calls.Available options:
- Mono VoIP 16 kbps
- Mono Wideband 32 kbps
- Mono FM 64 kbps
- Mono HiStudio 128 kbps
- Stereo Mid 128 kbps
- Stereo HiStudio 256 kbps
The MX2200 prioritizes the Opus codec at the selected quality.
If the receiver does not support it, another available codec will be automatically negotiated.
If the receiver does not support it, another available codec will be automatically negotiated.
SETUP → SIP Contacts
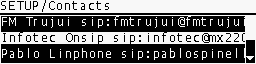
- Displays the SIP contacts directory.
- Basic navigation from the console; full editing only from the web interface.
Add a contact (web interface)
Add a contact (web interface)
- Access the web interface.
-
Select the CONTACTS tab.
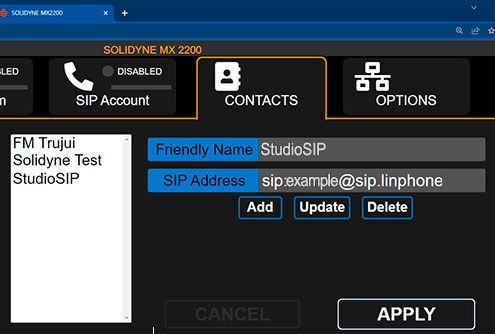
- Enter SIP Address and Friendly Name.
- Click ADD and then APPLY to send changes to the hardware.
Edit contact
- Select the contact from the list.
- Modify the fields.
- Press UPDATE and then APPLY.
Delete Contact
- Select the contact.
- Press DELETE and then APPLY.
SETUP → Power Info
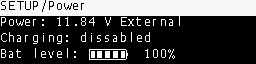
- Displays the power and battery status.
- Indicates whether the unit is using the internal battery or an external power source.
- Example:
Battery 7,0 V→ console powered by battery. - The
Bat levelfield indicates the remaining battery level (%). - A 100% charge typically provides over 3 hours of on-air operation.
- The unit automatically shuts down when the voltage reaches 6,2 V.
- A 12 V power bank can be used as an external power source.
SETUP → Time Zone
- Adjust the time zone to correctly assign date/time to recordings.
- Typically configured only once.
- Synchronization is performed via public NTP servers.
SETUP → RX Volume
- Adjusts the return level sent from the station when the connection is via SIP.
- This return is added to:
- CUE monitoring circuit (headphones).
- Send to POTS lines.
- Send to Bluetooth line.